Spring Cloud体系中提供了Config组件来进行配置服务管理。而Consul除了提供服务注册与发现功能外,同时也提供配置管理功能。本位将介绍如何结合Spring Cloud + Consul实现配置管理。
本文中使用的工程及环境参考上篇文章《Spring Cloud 基于Consul 实现服务注册与发现》
添加配置依赖
在leon-consumer项目中添加配置依赖
    org.springframework.cloud
    spring-cloud-starter-consul-config
添加项目配置
新建bootstrap.yml文件,在文件中添加配置服务相关参数配置:
spring:
  application:
    name: leon-consumer
  cloud:
    consul:
      host: localhost
      port: 8500
      config:
        enabled: true
        format: yaml
        prefix: config
        default-context: leon-consumer
        data-key: data
添加配置文件及数据
新建application-dev.yml、application-test.yml配置文件,分别代表开发、测试环境配置文件,其中分别指定开发和测试环境的端口为8081、8082
server:
  port: 8081
server:
port: 8082然后在application.yml中指定想要启用的环境配置
spring:
profiles:
active: test此时代表项目启动使用测试环境,服务应该运行在8082端口,整个配置文件体系结构如下:

然后在web管理界面选择key/value,点击create,新增配置信息

分别填入想要保存的配置信息,以key-value的形式保存
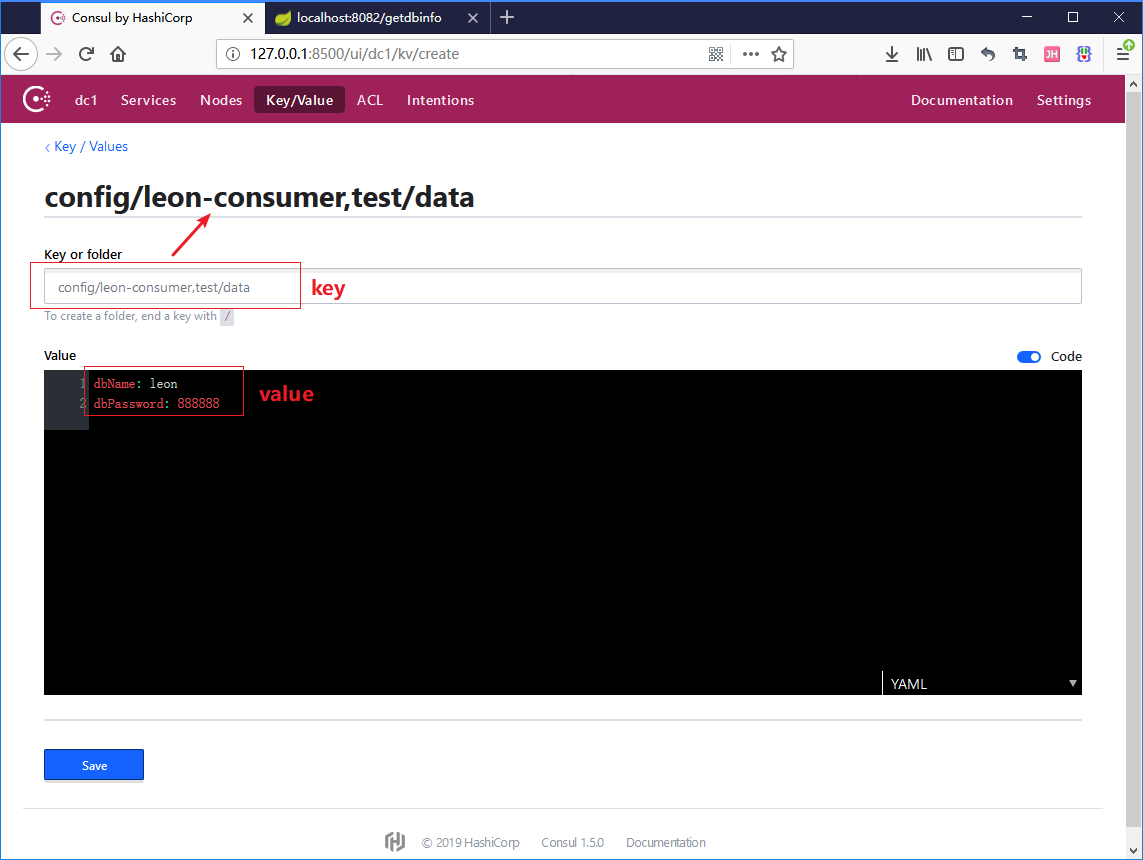
这里key值需要和项目工程中的配置保持一致。
仔细对比,相信都能明白字段对应的位置。建议先按照默认的配置,能够正常访问得到数据后在进行自由更改。
spring:
cloud:
consul:
host: localhost
port: 8500
config:
enabled: true # 开启配置管理服务
format: yaml # 配置的格式,有四种选择
prefix: config # 配置所在的应用目录名称
default-context: leon-consumer # 服务名称,也就是spring.application.name的值
data-key: data # 默认为data,可以更改,需要和consul创建时保持一致填入value值后点击save保存即可。注意如果是YAML格式,那么数据间的冒号后要有空格。
在项目中获取配置
在leon-consumer项目中,新建ConfigController类,读取线上配置信息
@RestController
public class ConfigController {
@Value("${dbName}")
private String dbName;
@Value("${dbPassword}")
private String dbPassword;
@GetMapping("/getdbinfo")
public String getDBInfo() {
return "数据库用户名:" + dbName + " | 数据库密码: " + dbPassword;
}
}运行服务,然后访问接口getdbinfo,查看结果。注意此时我们运行是test环境,所以需要访问8082端口。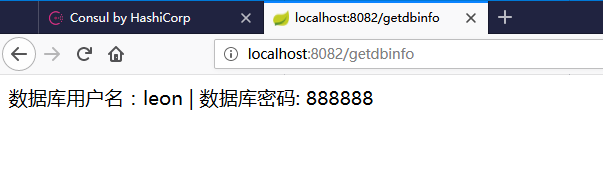
自动刷新配置信息
能够获取到配置信息后,此时更改线上配置数据:
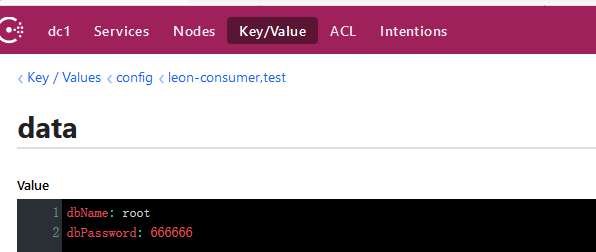
此时我们刷新浏览器,访问getdbinfo接口是无法刷新数据的。想要能够实时刷新配置数据,需要在类上添加注解 @RefreshScope
@RestController
@RefreshScope
public class ConfigController {
@Value("${dbName}")
private String dbName;
@Value("${dbPassword}")
private String dbPassword;
@GetMapping("/getdbinfo")
public String getDBInfo() {
return "数据库用户名:" + dbName + " | 数据库密码: " + dbPassword;
}
}添加注解后,重新启动服务,然后测试下就线上配置数据更改后就可以自动更新了,不用在重启服务。
复杂配置
上文中我们配置了简单的键值对信息,除此之外我们还可以配置复杂数据,更新配置数据:
dbName: leon
dbPassword: 666666
user:
name: leon
age: 18
desc: 帅哥在项目中添加引用
@RestController
@RefreshScope
public class ConfigController {
@Value("${dbName}")
private String dbName;
@Value("${dbPassword}")
private String dbPassword;
@Value("${user.name}")
private String name;
@Value("${user.age}")
private int age;
@Value("${user.desc}")
private String desc;
@GetMapping("/getuserinfo")
public String getUserInfo() {
return name + " | " + age + " | " + desc;
}
@GetMapping("/getdbinfo")
public String getDBInfo() {
return "数据库用户名:" + dbName + " | 数据库密码: " + dbPassword;
}
}重新启动后,访问 getuserinfo 接口,可以看到能够正常访问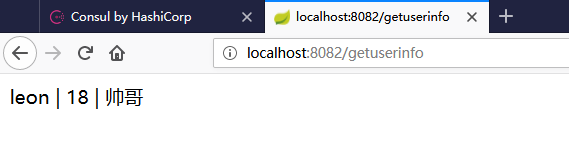
如果觉得这种方式比较繁琐(Java可是要面向对象的啊),可以通过一个对象类获取整个配置信息。
添加两个Bean类:
public class User {
private String name;
private int age;
private String desc;
//...get/set方法
}
@ConfigurationProperties()
public class ConfigBean {
private String dbName;
private String dbPassword;
private User user;
//...get/set方法
}注意此时已经给ConfigBean添加了注解:@ConfigurationProperties()
然后给启动类添加注解:@EnableConfigurationProperties(ConfigBean.class)
@SpringBootApplication
@EnableFeignClients
@EnableConfigurationProperties(ConfigBean.class)
public class LeonConsumerApplication {
public static void main(String[] args) {
SpringApplication.run(LeonConsumerApplication.class, args);
}
}然后就可以直接调用获取信息,在之前的Controller类中添加引用:
@Autowired
private ConfigBean configBean;
@GetMapping("/getallinfo")
public String getAllInfo() {
StringBuilder allInfo = new StringBuilder();
allInfo.append(configBean.getDbName() + " | ");
allInfo.append(configBean.getDbPassword() + " | ");
allInfo.append(configBean.getUser().getName() + " | ");
allInfo.append(configBean.getUser().getAge() + " | ");
allInfo.append(configBean.getUser().getDesc() + " | ");
return allInfo.toString();
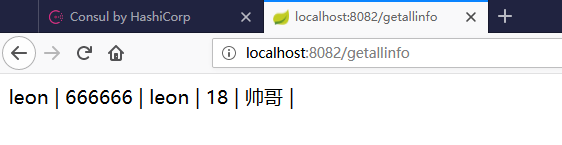
}重新运行服务,然后访问接口查看信息 http://localhost:8082/getallinfo
小问题
在配置类中添加@ConfigurationProperties注解后会出现提示信息。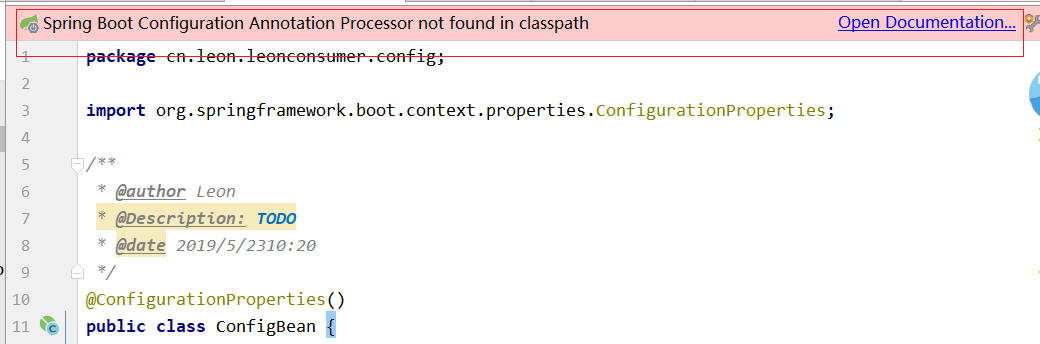
此提示信息不影响项目运行。
查询过后了解到是因为在注解中没有配置(prefix=””),没有指定 classpath 时,IDEA 提示没有找到 classpath,在spring boot1.5以上版本@ConfigurationProperties取消location注解,我们使用1.5.21版本所以会由此问题,可以在IDEA中配置取消提醒,具体方式可以参考文章:https://blog.csdn.net/expect521/article/details/77151094
配置文件使用线上配置
除去前面说的可以在项目代码中引用线上配置,同时还可以在配置文件中直接引用线上配置。
在项目中添加MySQL和Mybatis的依赖
org.mybatis.spring.boot
mybatis-spring-boot-starter
1.2.0
mysql
mysql-connector-java
为了方便,复用之前的User类。在User类中添加id字段
privata long id;在项目中添加Mapper类:
@Mapper
public interface UserMapper {
public User getDmUserById(@Param(value = "id") String id) throws Exception;
}在resource目录下添加配置文件:
<mapper namespace="cn.leon.leonconsumer.mapper.UserMapper">
<select id="getDmUserById" resultType="cn.leon.leonconsumer.config.User">
select
id as id,
name as name,
age as age,
description as description
from user
<trim prefix="where" prefixOverrides="and | or">
<if test="id != null">
and id=#{id}
</if>
</trim>
</select>
修改application-test.yml文件,添加mybatis和mysql的相关配置:
server:
  port: 8082
mybatis:
mapper-locations: classpath:mapper/*Mapper.xml
spring:
datasource:
url: jdbc:mysql://localhost:3306/temp?useUnicode=true&characterEncoding=gbk&zeroDateTimeBehavior=convertToNull
username: ${dbName}
password: ${dbPassword}
driver-class-name: com.mysql.jdbc.Driver修改线上配置参数,配置正确的账号和密码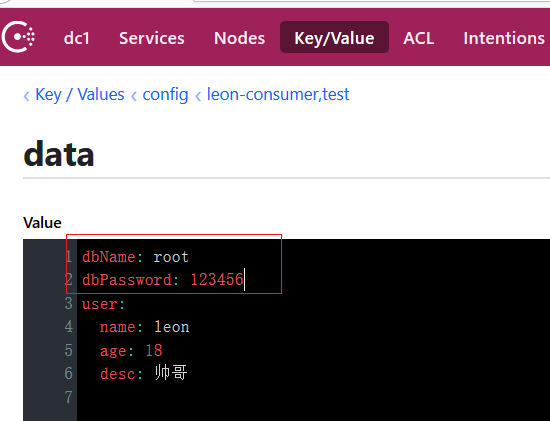
添加获取用户方法
@Autowired
private UserMapper userMapper;
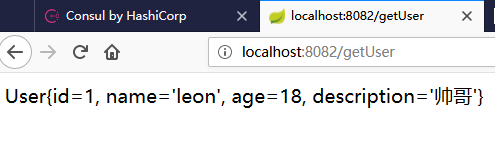
@RequestMapping("/getUser")
public String getUser() throws Exception {
User user = userMapper.getDmUserById(1);
return user.toString();
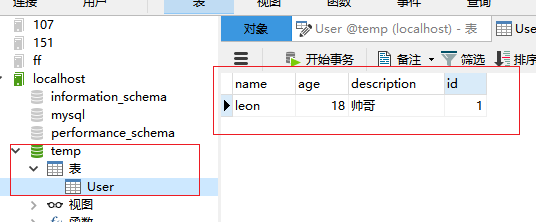
}User定义的字段desc可能会和数据库关键字冲突,改成description.xml文件上文已改
然后访问此方法,可以看到能够正常连接数据库获取信息:
同时我们还可以将整个配置信息都放到线上,这样每个项目都不需要在自己的项目中再单独配置。
将application-test.dev.yml中的数据库配置信息都删掉
然后将数据库配置都放到线上:
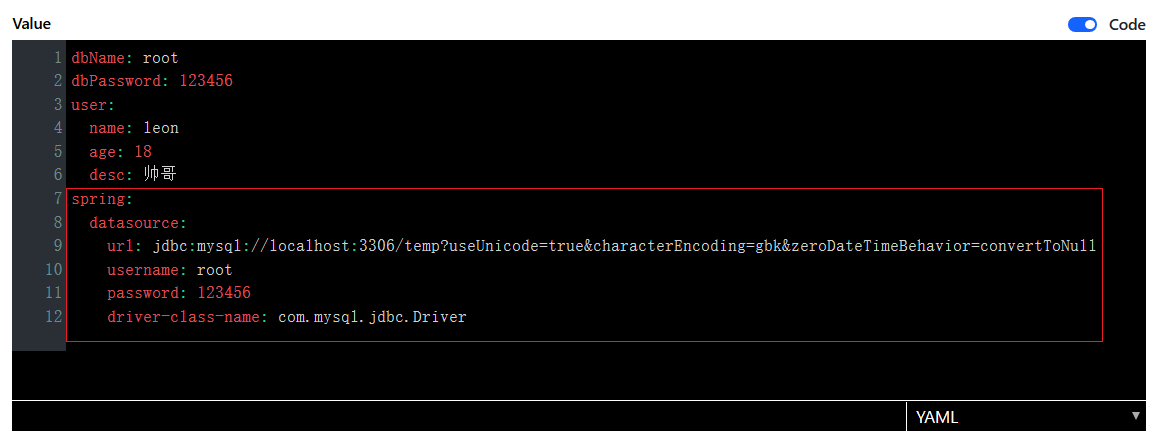
然后重新启动服务,发现正常运行,接口可以调用。